
Early to mid-Autumn is full of plants and berries that can be harvested for natural dyes. Sumac berries, acorns and walnuts are a few of the excellent dye stuff available. I picked sumac berries for this dye session. The bright red cones stand out on the bushes along the roadside. They are an easy plant to identify by their stunning leaves that turn red, orange and yellow in fall and the gorgeous red cones that top off the branches.

FORAGE
Foraging for sumac berries is fairly easy. The sumac bush is plentiful along roadsides, forest edges and in clearings. I found quite a few just a short walk from my farm along the road. When picking sumac berries find the brightest red cones that are free from mold or have not browned. Take only what you need as wildlife uses these berries for nourishment during the winter. I just used a pair of pruners to clip off the berries at the stem

I cannot emphasize enough how important it is to weigh your dye stuff and your material you will be dyeing. You will want the right ratios so you have a good solid dye on your material.

SIMMER AND SIMMER SOME MORE
Place the weighed berries in a large steel pot with 3-4
gallons of water. You will need about 50 grams or 1.764 ounces of berries to 50 grams of dye material (wool, cotton, linen, alpaca, etc.).
Bring to a boil and turn down the heat to simmer. Let simmer 60 to 90 minutes. Turn heat off and place a lid on the pot and let sit overnight. The next day bring to a boil and turn heat down to simmer. Let the dye simmer for 60-90 minutes. Turn off heat and let cool to room temperature.

When the dye is cooled you can strain the dye stuff out with a mesh strainer. The dye is now ready for you to use.
MORDANT
I recommend preparing your wool or other material ahead of time. I usually have my items already scoured and a pre-mordant on them. Depending on what type of material you are using the process will be different. I use my own wool and alpaca yarn grown on my farm. For the cotton and linen items, I up-cycle from garage sales and second hand stores. I will follow up with the mordant process for both protein and cellulose fibers in another blog.
DYEING
To begin the dye process wet your material in cool water. Let it sit in a bowl or bucket for about 20 minutes to ensure that all the material has absorbed water. Gently squeeze the water out and place into the room temperature dye pot. Be sure there is plenty of room for the material to float around. If the skeins or fabric are crammed in the pot the dye won’t set evenly. I use a wooden chopstick to push the fabric around. I also set a metal strainer at the top of the pot to keep the material submerged in the dye.

Slowly bring to a simmer or about 180F. Let simmer for about 30 minutes. Do not boil. Turn off heat and let the material stay in the dye bath overnight. At this point I check to see if the material has absorbed the dye as I would like. You can leave it another day at room temperature in the pot. When you are ready to remove the material I found it best to lift gently with a spoon and let the dye drain off. Then I put it in a plastic tub and rinse in room temperature water. You don’t want the temperature of the material to be different from the temperature of the water you are using otherwise it “shocks” the fiber and can felt or shrink it. Rinse the material well until the water runs clear. Line dry your items.
AFTER BATH
I prepared an iron dip for my items. I dyed wool, alpaca, cotton and linen. After removing from the dye bath I prepared a pot of water and added a dash of iron mordant which I made from rusty nails.
Iron Mordant Recipe:
1 glass jar, handful of rusty nails, 1 part white vinegar, 2 parts water. Let sit for a few days.

This photo is before the mixture has set for a few days.
I placed the materials directly from the dye pot into the iron mordant and brought it to a simmer for 10 minutes. Do not leave the material in the iron mordant more than 10-15 minutes. Remove the material from the pot and place in a bowl or tub. Let the material cool to room temperature and then you can rinse them out until the water runs clear. Line Dry.
THE GOOD & THE BAD
Below are the photos of what happened when I dyed with sumac berries. I loved some of the colors and others….not so much.
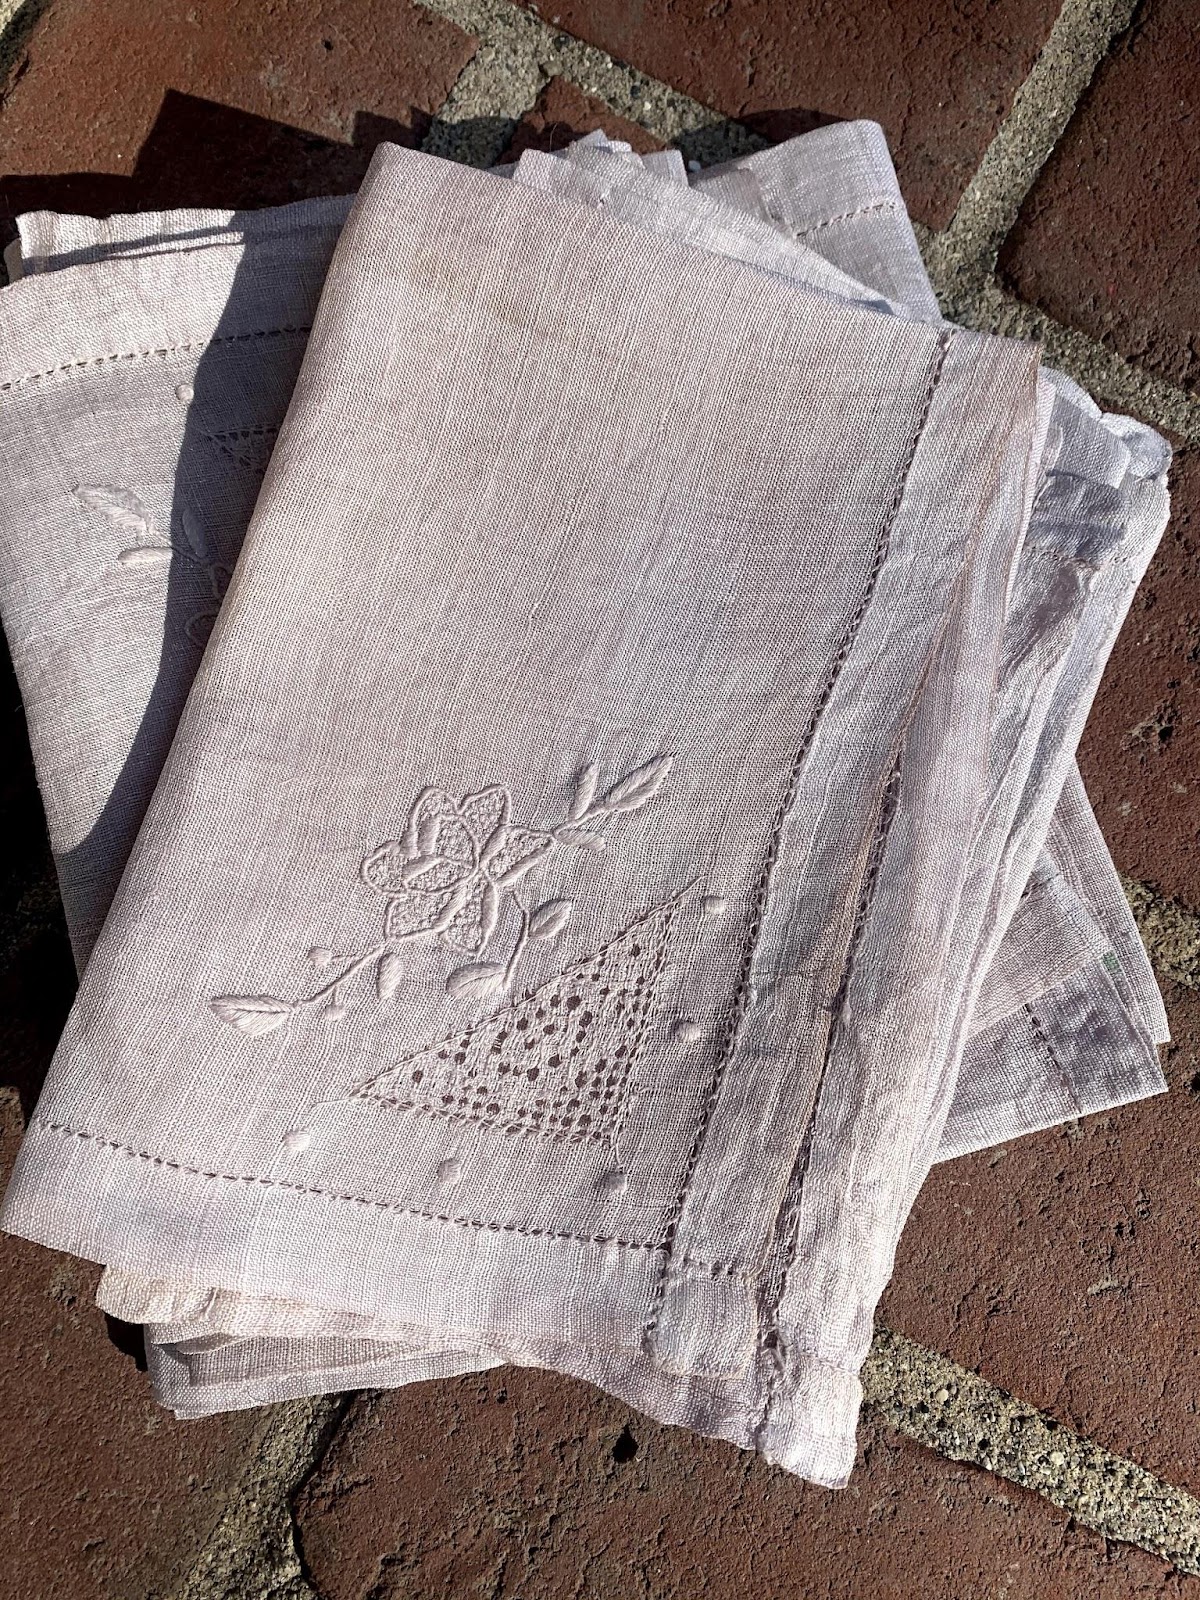
This photo is linen napkins dyed in sumac berries with a three step mordant. You will notice the blotchy appearance. That is due to the second step in my mordant that included tannic acid. I made my own by steeping sumac leaves. It left the material splotchy and tinted yellow. I don’t think the yellow shade interfered with the end dye result but the blotches did. Overall, I sort of like how the sumac dye has a variegated purplish pink hue.

On left is a cotton cami that just didn’t take the dye. I left it for two days in the dye pot and it repelled dye. I ended up dipping it in the iron water but that only made it worse. This gets the bad award.
 The top napkin is cotton dyed in sumac berries and then dip dyed in iron.
The bottom napkin is linen dyed in sumac berries. The photo doesn't show the slight pinkish tinge of the dye on the linen. It is quite pretty.


more released are aveliable here..
ReplyDeletebuy tractors online
compact tractors online for sale
good blog
ReplyDeletenice an impressive